

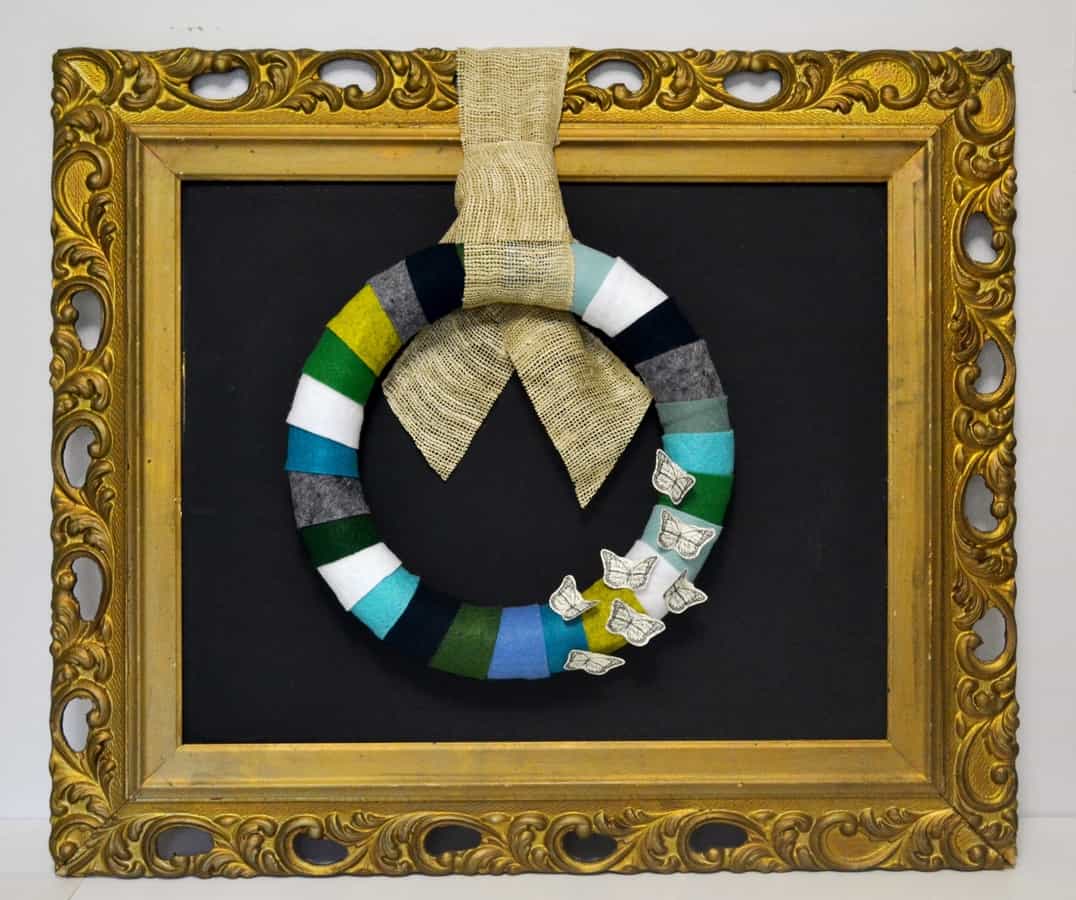
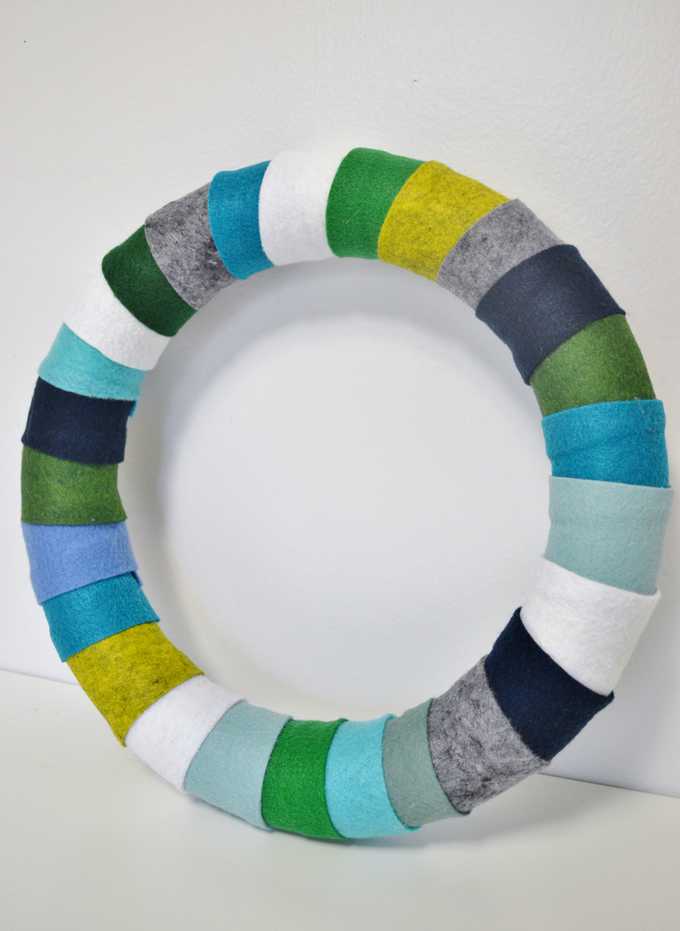
I should just have a separate blog dedicated to wreaths…I make them All. The. Time. For instance, here’s another felt wreath from last year, turquoise felt and glitter wreath, and, since Fall’s right around the corner, a roundup of favorite Fall wreaths. And that is just the tip of the iceberg. Though, in my defense, I haven’t created a wreath quite like this before. I love the blocks of color and it’s so, so simple!
Materials:
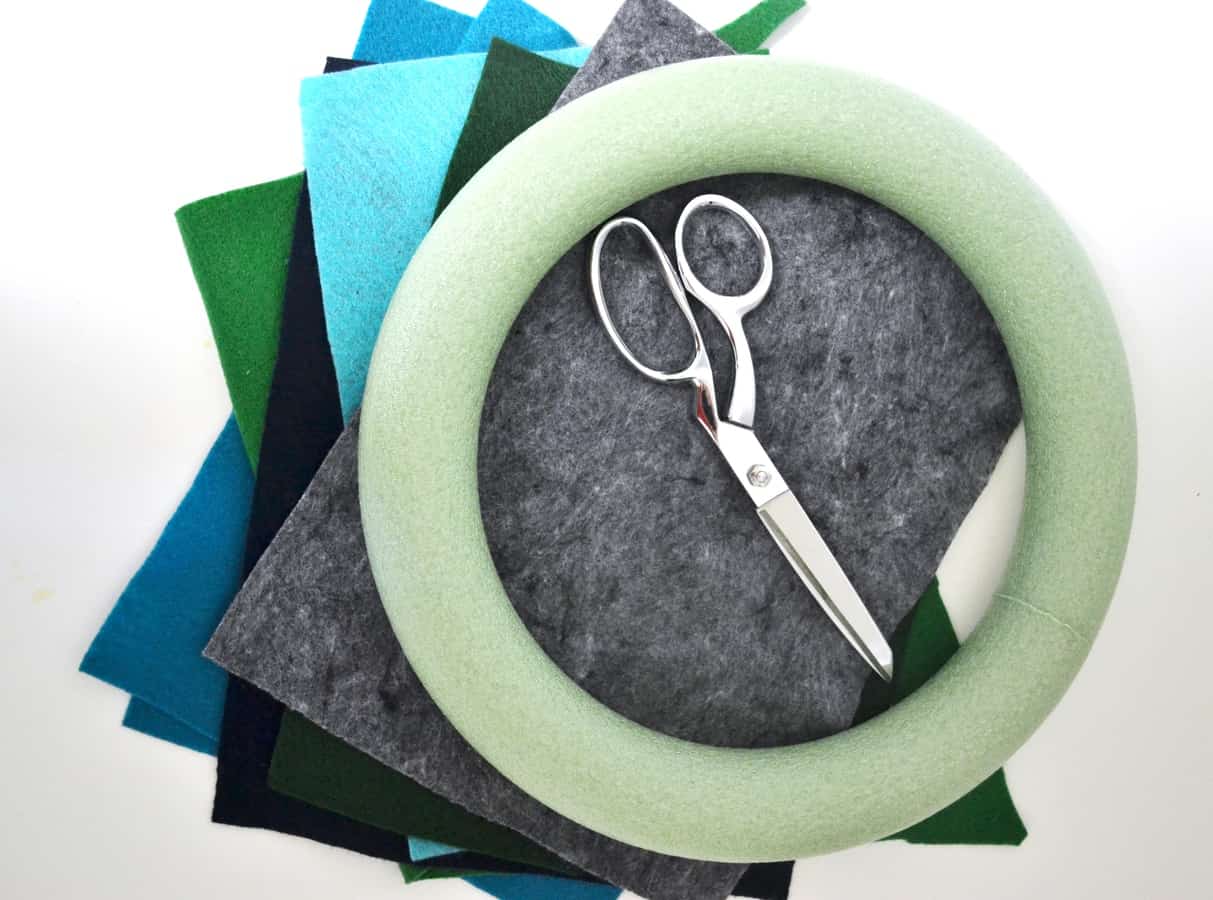
Various Colors of Felt
Wreath Form
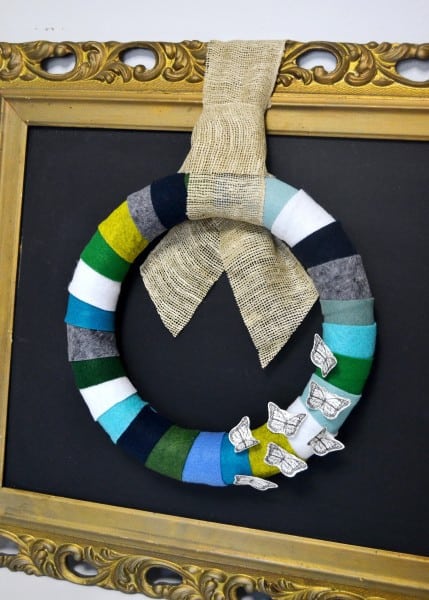
Embellishments (I used paper butterflies)
Hot Glue
Ribbon or Fabric for Hanging
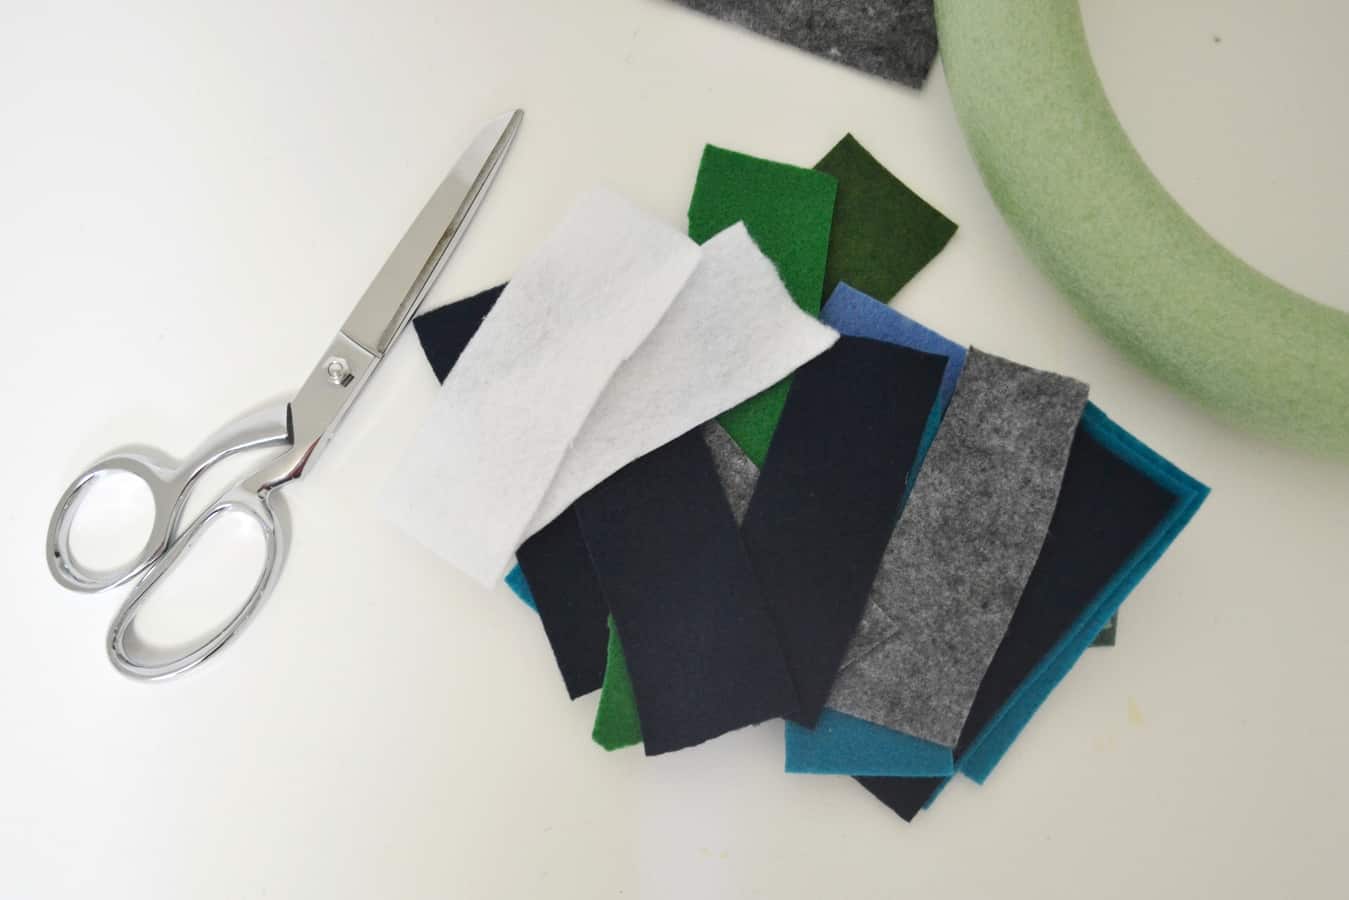
Step 1: Take your felt, and cut lengths that are approximately 6″ long x 2″ wide. I used 26 for my 12″ wreath form, but you’ll use more or less depending on how far apart you space them. I stuck with a blue, green and gray color palette, but wouldn’t this wreath look great in oranges, yellows, and reds for Fall? Or maybe lots of bright colors for a birthday? The color combinations are endless!
Step 2: Wrap a length of felt around your form, and hot glue it closed on the back of your form. Unlike other felt wreaths I’ve created, this one is really quick to make! It took about 15 minutes to glue all the felt to the wreath.
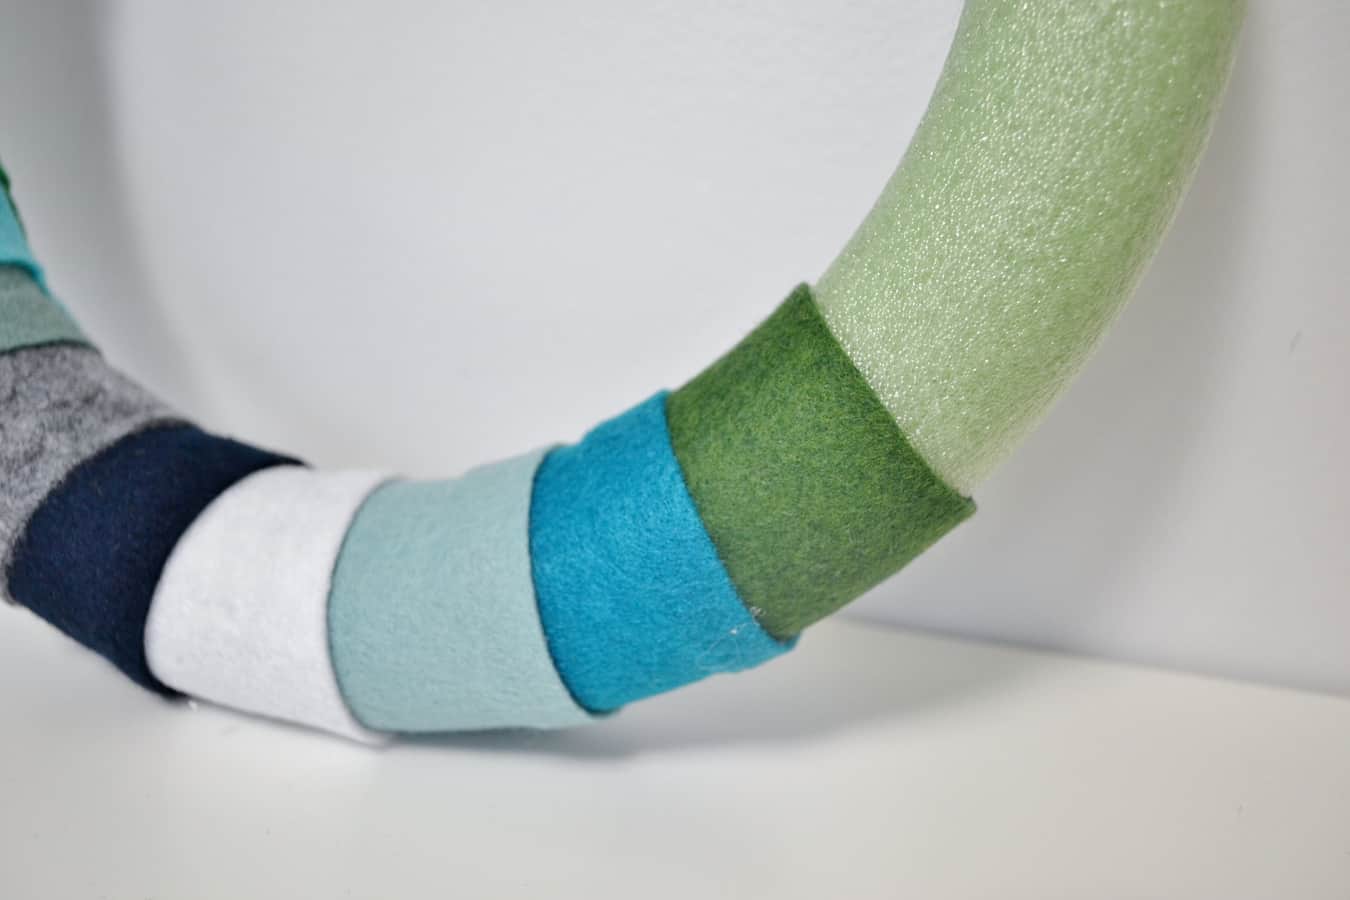
Step 3: When you’re done, you’ll have this.
Step 4: Add some embellishments (or keep plain for a simpler, more modern look), hang, and admire!
Thanks for reading all about my easy felt wreath! Have a fantastic day!

Patty Thurlby
Saturday 29th of July 2017
What a cute idea and great instructions! Thanks!